Table of Contents
|
Repairing JPEG file encoded by ransomwareRansomware is a type of malware that encrypts some of your crucial files and then ransoms for money to decrypt them. With JpegMedic, you can partially recover encrypted JPEG files. The way ransomware encrypts files depends on the type of ransomware. Some types only encrypt the beginning of the file, while others can encrypt the beginning, the end, and the middle of the file. Others can even encrypt the entire file. However, the majority of ransomware encrypts files only partially to speed up the infestation of the system. This opens a possibility to recover the non-encrypted part. The recovery strategy significantly depends on what type of ransomware has encrypted your files. But regardless of the strategy you will need just one good image made with the same camera and preferably with the same settings as the encrypted one. Recovery of a JPEG file with the encrypted beginningHint! For some simpler cases when ransomware only encrypts the beginning of the file you can try to use JpegMedic ARWE. JpegMedic ARWE can recover such files in the batch mode, semi-automatically. To recover the image, follow these steps:
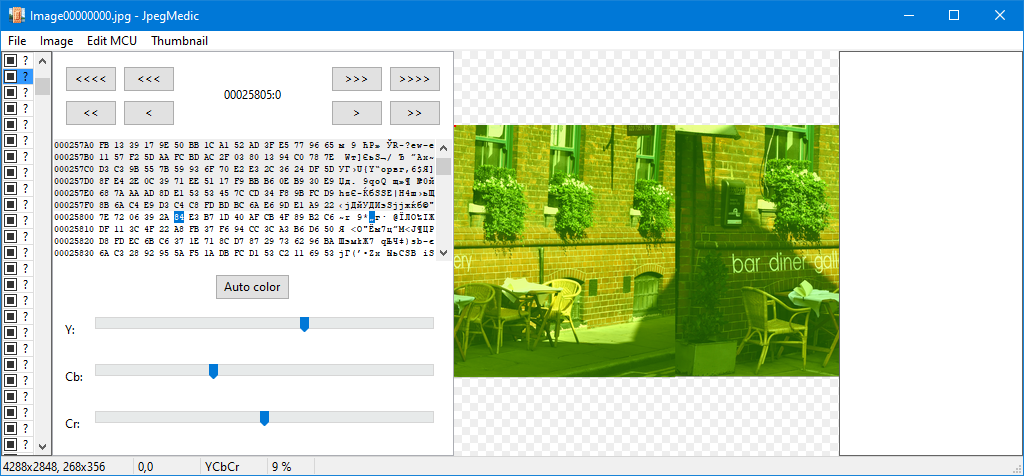
Hint: Each particular ransomware encrypts some fixed number of bytes, so after you have repaired the first encrypted JPEG file, remember the offset where you have found the first correct MCU. And when you will recover other JPEG files, you can simply jump directly to that offset and save a lot of time. The majority of ransomware encrypts first 153605 bytes of a file. After a while, when the cursor passes by the encrypted part of the data, you should see some image in the preview area:
Most likely, the image will be displayed incorrectly, with wrong colors or unaligned. So you will need to delete several first MCUs in the beginning of the image, because most likely they will be damaged, insert empty MCUs in the beginning of the file and then apply color correction. Please keep in mind that when you save a recovered JPEG file empty MCUs in the beginning of the image will be filled with gray color. So, to make the image more esthetical, you can just clear the entire first line. Upon saving this empty line will be removed completely from the image. After you perform all the repairing procedures, you will be able to see the correct image.
If you know the size of the encrypted part of the file, you can attempt to repair the image in the automatic mode. To do this, enable the The file was encrypted by ransomware option and enter the size of the encrypted part of the file into the corresponding field. Note: this option is only available if the very first cluster is selected in the Cluster view. When this option is selected, JpegMedic attempts to do the following operations:
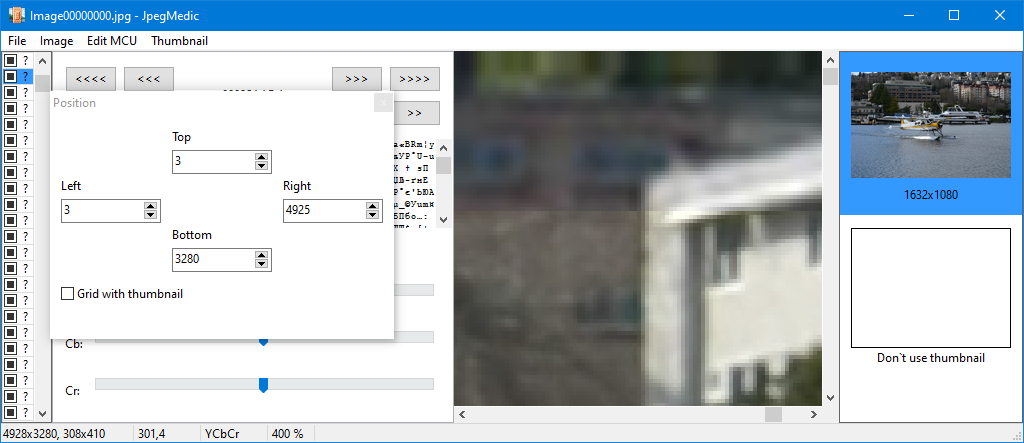
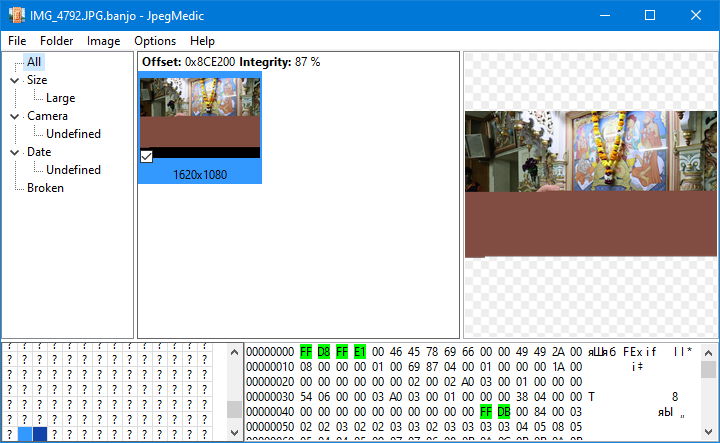
If everything goes fine, you should see automatically repaired image. And you only clicked a few times to get it! Also, the program automatically enables borders to allow you estimating the amount of lost data. It could be that the resulting colors will not look satisfying to you. In this case, you can perform additional color correction using the corresponding sliders. After that, the image is ready for saving. Some cameras add multiple thumbnails when saving JPEG files. One of such thumbnails can be saved to the end of file. For example, Nikon D4 adds three thumbnails, and the final thumbnail in the end of the file has quite good resolution, specifically 1632x1080 pixels. Since, ransomware encrypts only the beginning of the file, this thumbnail remains intact. Surely, you can simply save this thumbnail and don’t try to recover the original image. But instead you can use this thumbnail to replace broken MCUs in the beginning of the image and for better color correction. Which means you can restore almost 100% of the original photograph. When you open a file with such a survived thumbnail, the program automatically displays it and selects the first cluster containing this thumbnail in the Cluster view. That is why, to use the The file was encrypted by ransomware option you need to manually select the first cluster in the Cluster view. After that, JpegMedic will automatically use the thumbnail to refill the empty areas after deletion of the encrypted MCUs. This also allows for better color correction. Sometimes, dimensions of a thumbnail are not proportional to dimensions of the image. So you can see a discrepancy on the joint edges:
That is why you may need to additionally adjust position of the thumbnail.
After adjusting the position of the thumbnail and color correction you will end up with a good full-sized image that you can saving. Video demonstration: Recovery of a JPEG file where the beginning, the middle and the end are encryptedAs a general rule, after such encryption you can only recover two separated parts of the image. If such recovery has any practical meaning, is arguable and depends on the context:
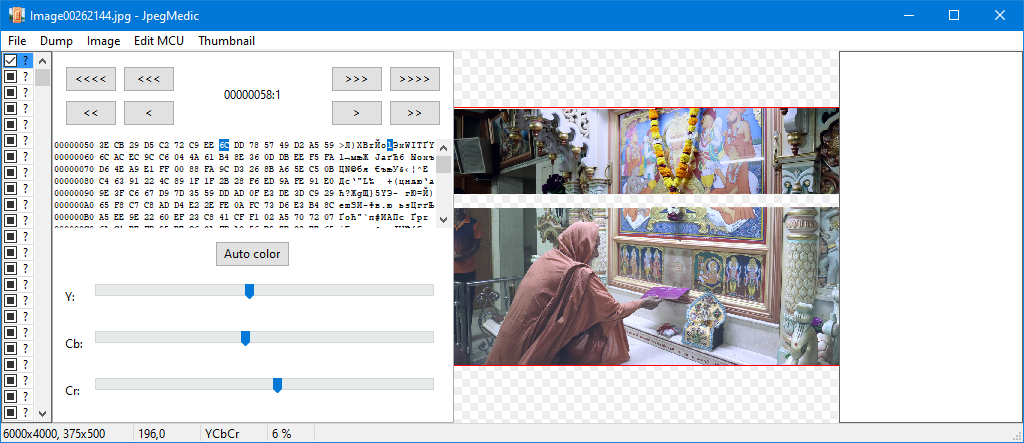
But in some cases even such damage can be fixed. As said above, some cameras write a big-size thumbnail image to the end of a JPEG file, and even two thumbnails in some cases. This means that the encrypted file ends up with the encrypted beginning and the middle, and a the end of the thumbnail. By combining the surviving parts of the image and thumbnails, you can recover almost 100% of the original photograph. When you open such a JPEG file in JpegMedic you can see that the program displays one or sometimes two relatively small damaged images, and the Offset field value will point to the end of the file or near it. It is the thumbnail we can use to fill the empty areas of the original photo:
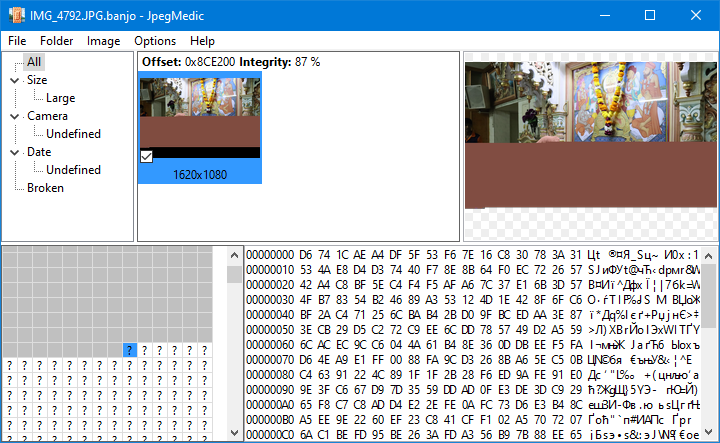
But first we need to locate the remaining parts of the main image. The principal algorithm to find the beginning of the main image is described above, and the procedure to locate the lower parts can be found in Finding the next correct MCU section. Some kinds of ransomware fill the encrypted parts with zeros. This allows locating the first non-encrypted cluster visually:
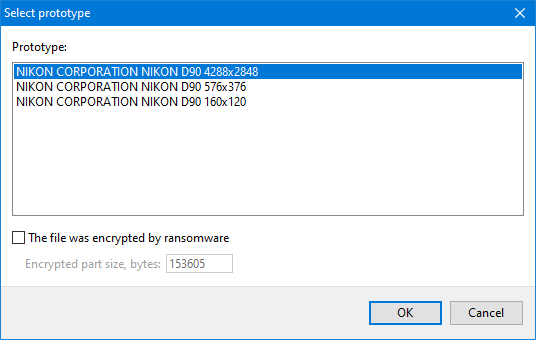
In such cases you simply need to select the first non-encrypted cluster, and then use the Image > Create new from current cluster command and in the opened window select the preliminary loaded correct image sample. After the image editing window opens, add the thumbnail the program has found using the Thumbnail > Add command. The thumbnail should appear in the right part of the window. Then, you simply follow the standard recovery steps using the available commands. The entire recovery procedure can be split onto several stages:
With some practice, the above procedure can take no more than three minutes, as shown on the below video: |