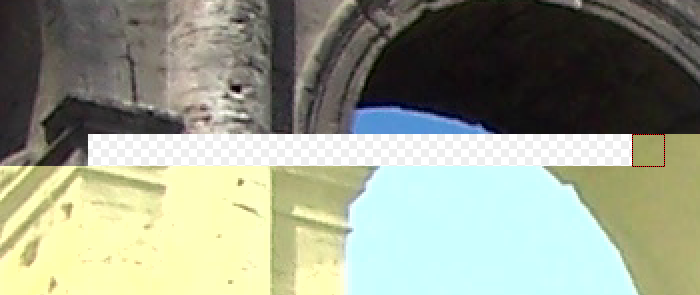
JPEG Medic // Accurate Manual JPEG Recovery
Table of Contents
  1. Overview
  2. Theory of JPEG Repair
    1. JPEG structure
    2. How to fix broken JPEG file
  3. Working with the Program
    1. Main menu
    2. Virtual folder tree
    3. Files panel
    4. Preview panel
    5. Cluster view
    6. Hex view
  4. Repairing JPEG image
    1. Opening JPEG file
    2. Repair window
      1. Menu commands
    3. Repair procedure
      1. Visual analysis and localization of damaged MCUs
      2. Finding the next correct MCU
      3. Deleting damaged MCUs
      4. Inserting empty MCUs
      5. Color correction
        1. Automatic color correction
        2. Manual color correction
      6. Filling empty MCUs with data
        1. Use the thumbnail image to fill the empty MCUs
        2. Auto-generate missing content
    4. Saving repaired JPEG image
    5. Repairing fragmented JPEG file
    6. Repairing damaged JPEG image based on SOS marker
    7. Repairing JPEG file encoded by ransomware

Inserting empty MCUs

After damaged MCUs are removed, the remaining blocks are shifted and the resulting image looks displaced. To fix this, insert empty MCUs.

To insert empty MCUs, select an MCU, the use the Edit MCU > Insert empty MCU menu command. An empty MCU is inserted before the selected MCU.

You should end up with an image like this:

Inserting empty MCU

As you see, the image now looks well aligned, but the colors are usually wrong. We need to apply color correction now.