Use the thumbnail image to fill the empty MCUs
This technique basically means filling the missing parts of the original JPEG image with the data taken from the thumbnail image of a lower resolution. Simply put, the removed parts of the original image will display thumbnail image instead. However, due to lower resolution of the thumbnail, such parts will look blurry. The lower thumbnail resolution is, the more blurry the recovered parts will look.
Below are two examples of restored images. The first one uses the 320x240 thumbnail to recover the image, and the second one uses the 160x120 thumbnail.
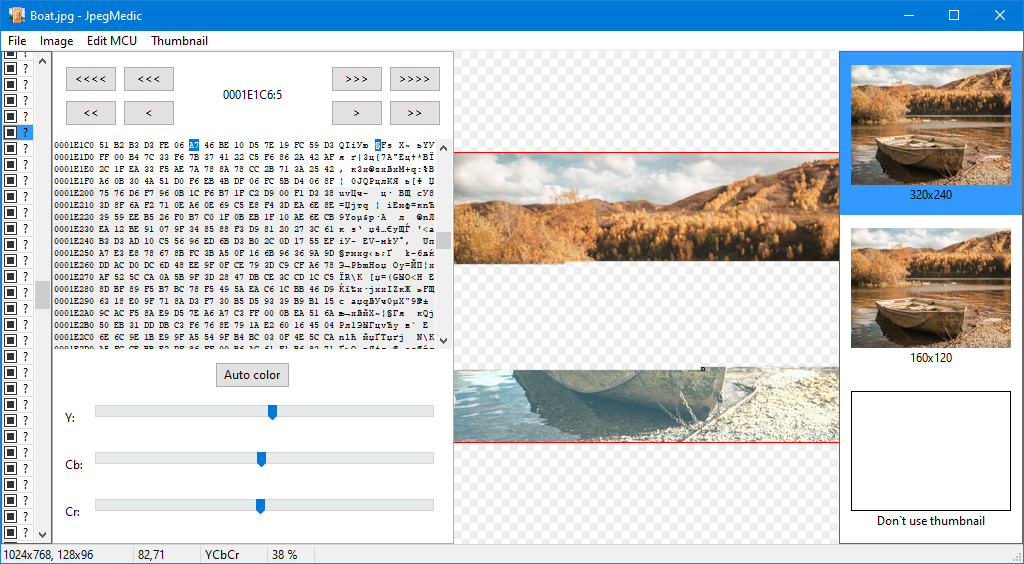

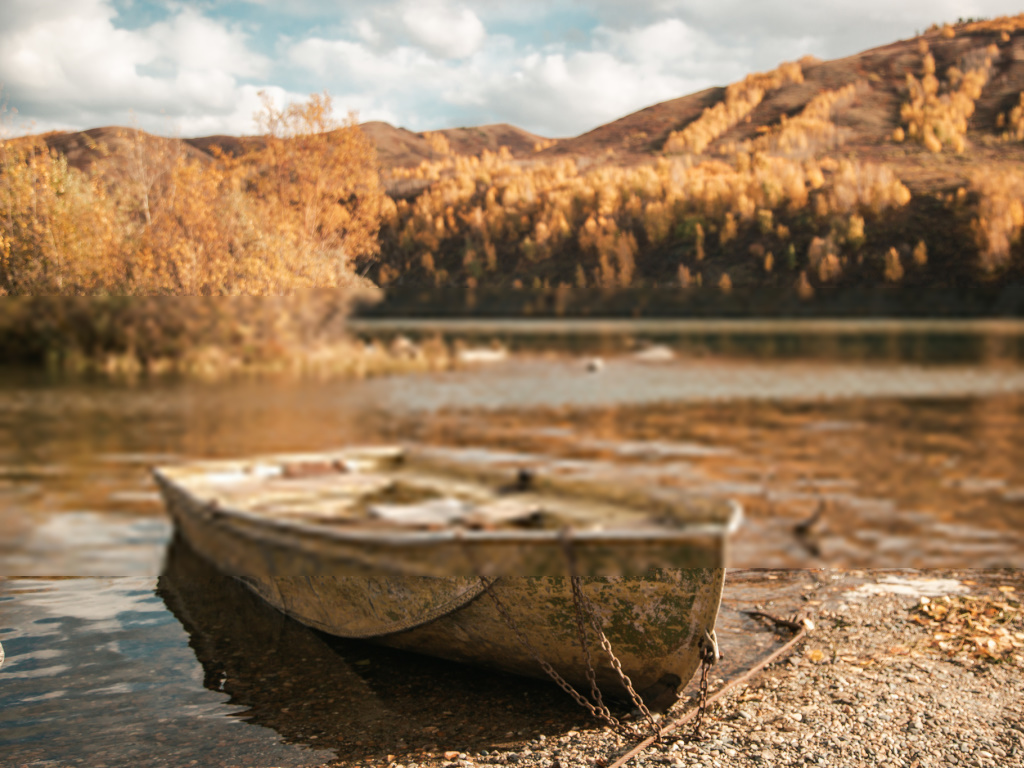
This method produces non-ideal results, but it's still much better than nothing. And if the thumbnail resolution is high, the resulting recovered image may even look acceptable.
To preview how the image combined of the original MCUs and the thumbnail image look like, use the Image > Show thumbnail.
To use a specific thumbnail, select it in the Thumbnail list in the right part of the Repair window. The selected thumbnail will be applied automatically when you save the image.
IMPORTANT! The repaired image is always saved using the thumbnail, regardless of whether the Show thumbnail option is turned on or off. If you want to explicitly disable using thumbnails to fill the empty MCUs, select the Don't use thumbnail in the Thumbnail list.
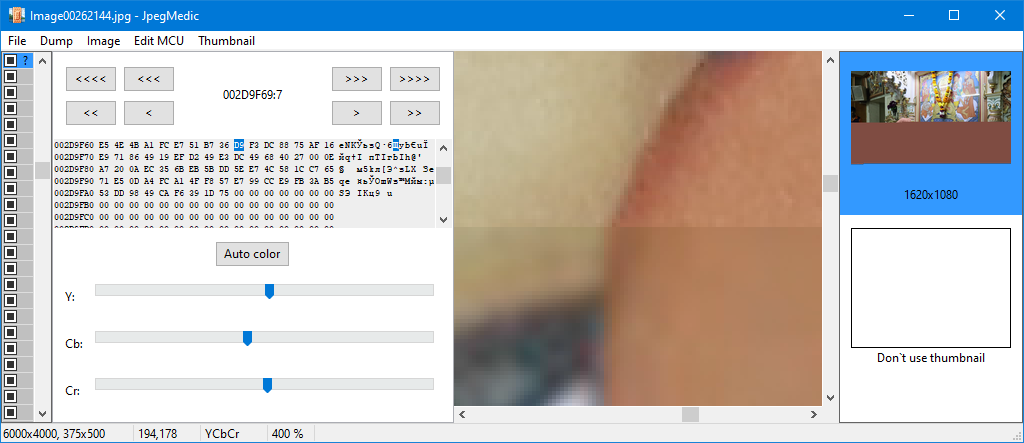
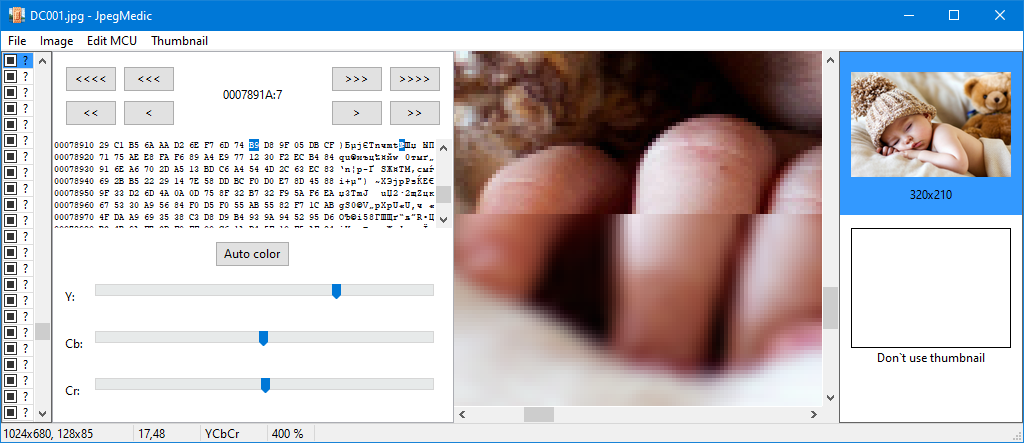
Using a thumbnail to fill empty spaces implies that pixels of the thumbnail is converted from the RGB color space to the color space of the original file (typically YCbCr) and then quantized according to quantization tables of the original JPEG image. As a result, this may lead to slight but visible discrepancy between colors of the inserted thumbnail part and the rest of the image. This can be seen on the edge where the original image and the converted thumbnail link together:
You can avoid this by filling the empty space before saving the file. Use the Edit MCU > Apply thumbnail command. When you apply the command, select any empty MCU from the sequence of empty MCU blocks. The command will fills all empty MCUs in the selected sequence, the same way it would be done if you saved the file. Then, the program applies automatic color correction to the filled MCU blocks, which results in a better final result:

After this command finishes, the cursor is set to the first MCU just after the filled sequence. This may come in handy if there are visual differences in color tone between the filled area and the following graphical data. You can eliminate this difference using the Edit MCU > Auto color command.
After the program executes the Apply thumbnail command, it treats the filled MCU blocks as normal MCUs. That is, you can apply any operations to them as usual – move, delete, clear and so on.
Some cameras may save thumbnails with certain specifics, for instance with black borders or with dimensions that does not multiply to the size of the original image. JpegMedic allows you to fix such peculiarities to be able to use thumbnails for filling empty areas of the recovered image.
Fixing black borders
Some cameras save thumbnail with black borders:

In this case, the repaired image will also have such ugly black bands below the image. To remove these bands, use the Thumbnail > Edit menu command.
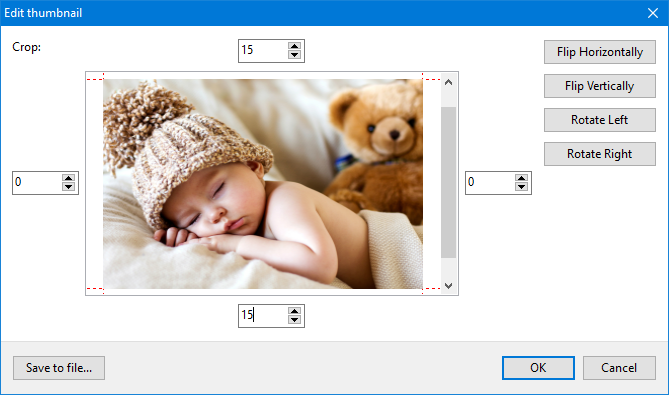
In the Edit thumbnail window, you can crop the image so to remove the black bands. You can also rotate the thumbnail image or flip it here if JpegMedic was not able to determine the orientation of the thumbnail automatically.
To save the edited thumbnail to an external file, click the Save to file button.
Fixing non-matching thumbnail size
Some cameras save thumbnail images so that their size does not multiply to the size of the large image. When you use such a thumbnail to fill the "gaps" in the damaged JPEG, the resulting combined image looks not very good, because the enlarged thumbnail does not match the original image. This can be clearly seen at the edges:
To fix this, use the Thumbnail > Position menu command. This command brings up the window where you can adjust positioning of the thumbnail:
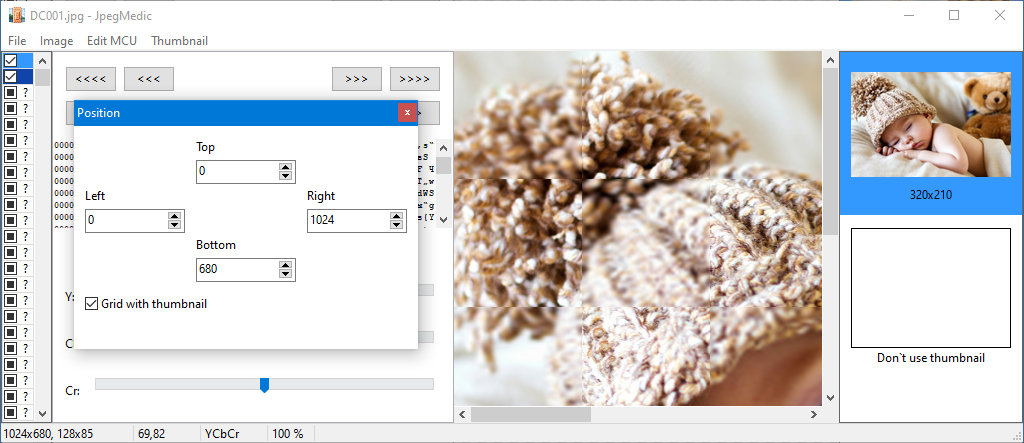
The Grid with thumbnail option displays the resulting image as a chessboard where cells containing the original image alternate with cells from the thumbnail. This simplifies visual positioning of the thumbnail.
If the program failed to match a thumbnail with the original image and hence the thumbnail is not available, you can select it manually using the Thumbnails > Add menu command. You can also add a thumbnail image from any external file using the Thumbnails > Add from file command.
|